
Stone Plastic Composite (SPC) ကြမ်းပြင်သည် သစ်သားနှင့် ကျောက်ကြမ်းခင်းများအစား ဈေးနှုန်းချိုသာပြီး ခိုင်မာကာ တပ်ဆင်ရလွယ်ကူသည့် အစားထိုးနည်းလမ်းအဖြစ် ကြမ်းပြင်လုပ်ငန်းကို တော်လှန်ပြောင်းလဲခဲ့ပါသည်။ သဘာဝပစ္စည်းများ၏ အလှအပကို ခေတ်မီထုတ်လုပ်မှုနည်းပညာ၏ လက်တွေ့ကျမှုနှင့် ပေါင်းစပ်ထားသည့် ဤတီထွင်မှုသည် သင့်နေအိမ်ကို ပြောင်းလဲပေးရန် DIY အတွေ့အကြုံကို ပေးစွမ်းပြီး ကျွမ်းကျင်သူများအား တပ်ဆင်မှုအတွက် ထောင်ချီကုန်ကျမှုများကို သက်သာစေပါသည်။
SPC ကြမ်းပြင်၏ လူကြိုက်များလာမှုသည် ရေ၊ အစင်းအကြောင်းနှင့် နေ့စဉ်အသုံးပြုမှုဒဏ်ကို ထူးချွန်စွာခံနိုင်ရည်ရှိခြင်းကြောင့်ဖြစ်ပြီး မီးဖိုချောင်၊ ရေချိုးခန်းနှင့် စီးပွားဖြစ်နေရာများကဲ့သို့ လူသွားလူလာများသောနေရာများတွင် အသုံးပြုရန် အကောင်းဆုံးဖြစ်စေပါသည်။ ပုံမှန်လမ်းနီးယိတ် (laminate) သို့မဟုတ် ဗီနိုင်းလ်ပလပ်စတစ်ပြားများနှင့်မတူဘဲ SPC ကြမ်းပြင်တွင် ပြင်းထန်သောပတ်ဝန်းကျင်တွင်ပါ ကြာရှည်စွာတည်ငြိမ်မှုရှိစေရန် အပူချိန်ပြောင်းလဲမှုကြောင့် ချဲ့ထွင်ခြင်း သို့မဟုတ် ကျဉ်းမြောင်းခြင်းမဖြစ်အောင် ကာကွယ်ပေးသော မာကျောသည့်အတွင်းပိုင်းအချောင်း (rigid core) ပါရှိပါသည်။ ခေတ်မီအိမ်ရှင်များသည် သဘာဝပစ္စည်းများကဲ့သို့ ထိန်းသိမ်းရန် လိုအပ်ချက်များကို မလိုအပ်ဘဲ ရှိသည့်အတိုင်း သစ်သားနှင့် ကျောက်ပုံစံအသွင်အပြင်များကို SPC ကြမ်းပြင်စုဆောင်းမှုများတွင် ရရှိနိုင်သည်ကို နှစ်သက်ကြပါသည်။
ပရော်ဖက်ရှင်နယ်တပ်ဆင်မှုဝန်ဆောင်မှုများသည် စတုရန်းပေလျှင် ၃ ဒေါ်လာမှ ၇ ဒေါ်လာကြားခန့်ကုန်ကျနိုင်သော်လည်း သင့်တော်သော ပြင်ဆင်မှုနှင့် ကိရိယာများဖြင့် အိမ်ရှင်အများစုသည် SPC ကြမ်းခင်းကို ကိုယ်တိုင်တပ်ဆင်နိုင်ပါသည်။ SPC ကြမ်းခင်းထုတ်ကုန်အများစုတွင် အသုံးပြုသော click-lock တပ်ဆင်မှုစနစ်သည် ကပ်ခြောက်များ သို့မဟုတ် မှိုန်းများကို မလိုအပ်စေဘဲ စတင်သူများအတွက် ရိုးရှင်းပြီး လွတ်လပ်စွာ လုပ်ဆောင်နိုင်မှုရှိစေပါသည်။ ဤအပြည့်စုံသောလမ်းညွှန်ချက်သည် ကနဦးအစီအစဉ်ချမှတ်မှုမှ နောက်ဆုံးအလှဆင်အဆင့်အထိ တပ်ဆင်မှုလုပ်ငန်းစဉ်၏ အားလုံးသောအပိုင်းများကို လမ်းညွှန်ပေးပါလိမ့်မည်။
နားလည်မှု SPC ကြမ်းပြင် တည်ဆောက်မှုနှင့် အကျိုးကျေးဇူးများ
အဓိကအစိတ်အပိုင်းများနှင့် အလွှာဖွဲ့စည်းပုံ
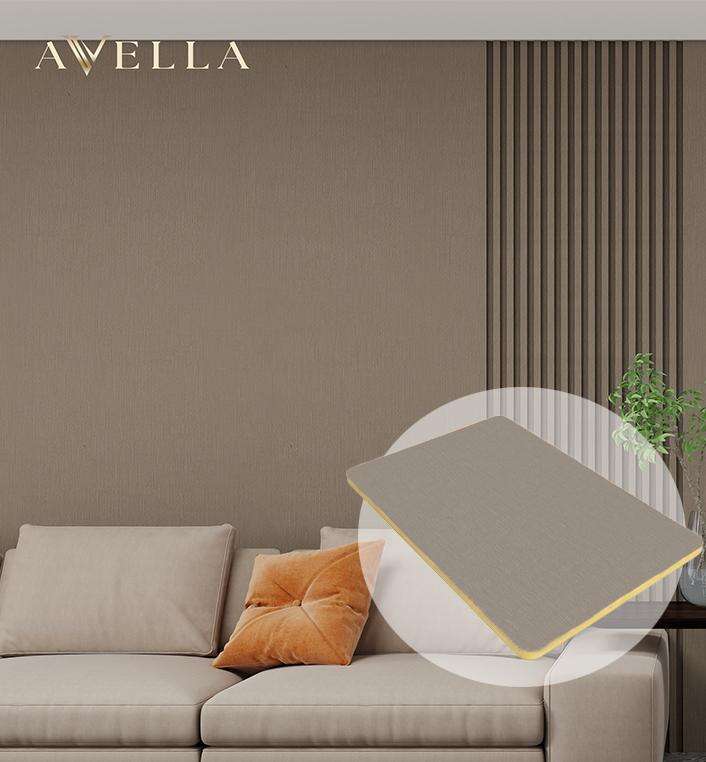
SPC ကြမ်းပြင်သည် စွမ်းဆောင်ရည်နှင့် သက်တမ်းရှည်ကို ပေးစွမ်းနိုင်ရန် အဆင့်ဆင့်ဒီဇိုင်းထုတ်ထားသော အလွှာများဖြင့် ဖွဲ့စည်းထားပါသည်။ အောက်ဆုံးအလွှာသည် ပုံသဏ္ဍာန်တည်ငြိမ်မှုကို ပေးသော အခြေခံအုတ်မြစ်ဖြစ်ပြီး ပြန်လည်အသုံးပြုသည့် ကျောက်ခဲနှင့် PVC ပစ္စည်းများဖြင့် ပြုလုပ်ထားပါသည်။ ဤအုတ်မြစ်ပေါ်တွင် တားဝင်မှုကို ခံနိုင်ရည်ရှိပြီး SPC အလွှာကို ပေးသော မာကျောသည့် SPC အလွှာရှိပါသည်။ ဤအလွှာသည် ရိုးရာ ဗင်နီယာပစ္စည်းများတွင် ဖြစ်တတ်သော ကွေးခြင်းပြဿနာများကို ကာကွယ်ပေးပြီး spc ကြမ်းပြင်ကို အခြား luxury vinyl ရွေးချယ်မှုများမှ ကွဲပြားစေပါသည်။ ထို့ပြင် ၎င်းသည် အဆင့်မြင့်စွမ်းဆောင်ရည်လက္ခဏာများကို ဖြစ်ပေါ်စေပါသည်။
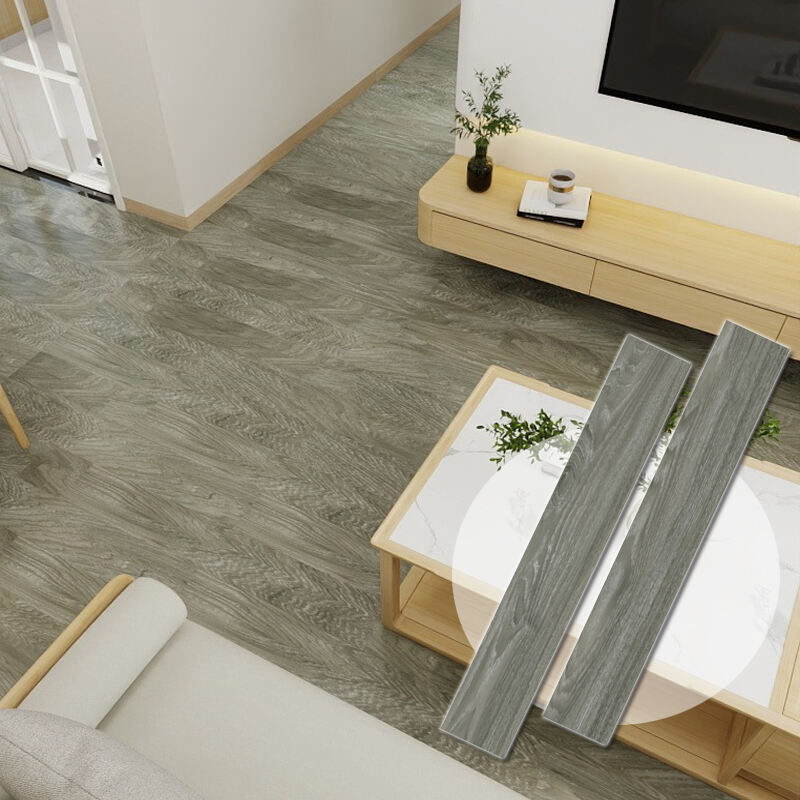
အလှဆင်အလွှာတွင် သဘာဝသစ်သားအက်ကွဲများ၊ ကျောက်ပုံစံများ သို့မဟုတ် ခေတ်ပေါ်ဂျီဩမေတြီပုံစံများကို မြင့်မားသော အရှိန်အဟုန်ဖြင့် ပုံနှိပ်ထားပါသည်။ ခေတ်မီပုံနှိပ်နည်းပညာများက ဤပုံစံများသည် သဘာဝကျပြီး အချိန်ကြာလျှင် ဖျော့သွားခြင်းမှ ကာကွယ်နိုင်ကြောင်း သေချာစေပါသည်။ အပေါ်ဆုံးအလွှာ (wear layer) သည် ပုံမှန်အားဖြင့် 0.3mm မှ 0.7mm အထူရှိပြီး အမှုန်အမွှား၊ အရောင်ဖျော့ခြင်းနှင့် UV ပျက်စီးမှုများမှ ကာကွယ်ပေးပြီး ကြမ်းပြင်၏ ပုံပန်းသဏ္ဍာန်ကို ဆယ်စုနှစ်များတိုင်အောင် ထိန်းသိမ်းပေးပါသည်။
ရိုးရာကြမ်းပြင်များထက် စွမ်းဆောင်ရည်ကောင်းများ
Spc ကြမ်းပြင်၏ ရေစိုခံသည့် သဘာဝသည် အောက်ခြေအခန်းများ၊ ရေချိုးခန်းများနှင့် စက်လျှော်ခန်းများကဲ့သို့ ရေစိုမှုကို ရှောင်လွဲ၍မရသည့်နေရာများအတွက် အကောင်းဆုံးဖြစ်စေပါသည်။ ရေနှင့်ထိတွေ့ပါက ပုံပျက်သွားတတ်သော သစ်သားကြမ်းပြင် သို့မဟုတ် ရေစိုပါက ဖောင်းကြွတတ်သော လမ်းများနှင့် မတူဘဲ spc ကြမ်းပြင်သည် စိုထိုင်းဆအဆင့် သို့မဟုတ် ရေကို မတော်တဆကျိုးကျသည့်အခါများတွင်ပါ မူလအတိုင်း ပုံသဏ္ဍာန်နှင့် အသွင်အပြင်ကို ထိန်းသိမ်းထားနိုင်ပါသည်။ ဤရေစိုခံသည့် ဂုဏ်သတ္တိသည် အပေါက်အများအပါအဝင် ပစ္စည်းများနှင့် နှိုင်းယှဉ်ပါက သန့်ရှင်းရေးနှင့် ထိန်းသိမ်းမှုကို သိသိသာသာ လွယ်ကူစေပါသည်။
အပူချိန်တည်ငြိမ်မှုသည် spc ကြမ်းပြင်စနစ်များ၏ အရေးပါသော အားသာချက်တစ်ခုလည်းဖြစ်ပါသည်။ မာကျောသော အတွင်းပိုင်းတည်ဆောက်ပုံသည် အပူချိန်ပြောင်းလဲမှုကြောင့် ဖြစ်ပေါ်လေ့ရှိသော ကျယ်ထွင်းခြင်းနှင့် ကျဉ်းသွားခြင်းကို ကာကွယ်ပေးပြီး အကွက်များနှင့် ကွေးခွန်းပြဿနာများကို ဖယ်ရှားပေးပါသည်။ ဤတည်ငြိမ်မှုသည် ချဲ့ထွင်မှုအပေါက်များ မလိုအပ်ဘဲ ပိုကြီးသော ကြမ်းပြင်ဧရိယာများကို တပ်ဆင်နိုင်စေပြီး သင့်အတွင်းပိုင်းတစ်လျှောက် အဆက်မပြတ် ကြမ်းပြင်များကို ဖန်တီးပေးကာ အမြင်အာရုံကို ပိုမိုကောင်းမွန်စေပါသည်။ အိမ် .
လုပ်ဆောင်ချက်အတွက် အခြေခံလုပ်ငန်းများနှင့် ပစ္စည်းများ
လိုအပ်သော တပ်ဆင်ရန်ကိရိယာများ
SPC ကြမ်းပြင်အထပ်ခင်းခြင်း အောင်မြင်စွာပြုလုပ်နိုင်ရန် တိကျသောဖြတ်တောက်မှုများနှင့် မှန်ကန်သောတည်နေရာချမှုကို သေချာစေမည့် ကိရိယာများ လိုအပ်ပါသည်။ အဆင့်မြင့် မိုက်တာ ဆော် (miter saw) သို့မဟုတ် စက်ဝိုင်းပုံဆော် (circular saw) တို့တွင် အမှုန့်အမျှင်ဓားပါ တပ်ဆင်ထားခြင်းဖြင့် ဖြတ်တောက်မှုလိုအပ်ချက်အများစုကို ကိုင်တွယ်နိုင်ပြီး ပူးပေါင်းလေထုသွင်းပေးသည့် ပေါက်များ သို့မဟုတ် တံခါးပေါက်များကဲ့သို့သော အတားအဆီးများအနီး ရှုပ်ထွေးသော ဖြတ်တောက်မှုများအတွက် ဂျစ်ဆော် (jigsaw) ကို အသုံးပြုရန် လိုအပ်ပါသည်။ တိကျမှန်ကန်သော ဒီဇိုင်းများနှင့် ဖြောင့်တန်းသော တပ်ဆင်မှုမျဉ်းများကို ထိန်းသိမ်းရန် တိုင်းတာသည့်ကိရိယာများဖြစ်သည့် တပ်မီးဆွဲ၊ စပီးဒ်စတုရန်းနှင့် ချောက်လိုင်းတို့ကို အသုံးပြုပါသည်။
ကိုင်တွယ်တပ်ဆင်မှု လုပ်ငန်းစဉ်တွင် လက်နှင့်ကိုင်သော ကိရိယာများသည်လည်း အရေးပါသော အခန်းကဏ္ဍမှ ပါဝင်ပါသည်။ တပ်ဆင်မည့် ပလပ်ချပ်များကို အစွန်းများ ပျက်စီးခြင်းမရှိစေဘဲ မှန်ကန်စွာ ချိတ်ဆက်နိုင်ရန် တပ်ချိတ်ပလုတ် (tapping block) နှင့် ဆွဲချိတ်ဘား (pull bar) တို့ကို အသုံးပြုပါသည်။ ခိုင်မာသော ချိတ်ဆက်မှုများအတွက် လိုအပ်သည့် အားကို ပေးစွမ်းနိုင်ရန် ရာဘာ တုတ် (rubber mallet) ကို အသုံးပြုပါသည်။ ကြမ်းပြင်ပေါ်တွင် အချိန်ကြာရှည် လုပ်ကိုင်ရသည့် အလုပ်များအတွင်း သင့်တို့၏ အဆစ်များကို ကာကွယ်ရန် ဒူးကာပေါင်း (knee pads) ကို အသုံးပြုပါသည်။ ဖြတ်လိုက်မှု လုပ်ငန်းစဉ်များအတွင်း အမှုန်အမွှားများမှ သင့်တို့၏ မျက်လုံးများကို ကာကွယ်ရန် မျက်မှန်ကာ (safety glasses) ကို အသုံးပြုပါသည်။ ပါဝါကိရိယာများ မလိုအပ်သော အမှတ်အသားပြုခြင်းနှင့် ကတ်တင်းလုပ်ငန်းများကို လုပ်ဆောင်ရန် ဓားစ် (utility knife) ကို အသုံးပြုပါသည်။
ပြင်ဆင်မှု ပစ္စည်းများနှင့် ပစ္စည်းကိရိယာများ
SPC ကြမ်းပြင်ကို သင့်တော်စွာ ပြင်ဆင်ရန်အတွက် အခြားပစ္စည်းများ လိုအပ်တတ်ပါသည်။ ကွန်ကရစ်အောက်ခံကြမ်းပြင်ပေါ်ရှိ အနည်းငယ်မှာယွင်းမှုများကို ကိုယ်တိုင်ညီမျှစေသည့် ပစ္စည်း (Self-leveling compound) ဖြင့် ပြင်ဆင်နိုင်ပြီး ပိုမိုမညီမျှသော မျက်နှာပြင်များအတွက် ပလိုင်ဝုဒ် (plywood) သို့မဟုတ် OSB အပြားများ လိုအပ်နိုင်ပါသည်။ အောက်ခြေအခန်းများတွင် မြေအောက်ရေစိုစွတ်မှုမှ ကာကွယ်ရန် ရေစိုခံအလွှာများ အသုံးပြုရပြီး SPC ကြမ်းပြင်များသည် ရေပျက်စီးမှုကို ခံနိုင်ရည်ရှိသော်လည်း ဖြစ်ပါသည်။
SPC ကြမ်းပြင်တပ်ဆင်မှု၏ ပရော်ဖက်ရှင်နယ်ပုံစံကို ပြီးပြည့်စုံစေရန် sPC ကြမ်းပြင် အခန်းအစွန်အထွေရှိ ကျယ်ပြန့်မှုအကွာအဝေးများကို ဖုံးကွယ်ရန် စတုတ္ထစက်ဝိုင်းပုံမော်လ်ဒင်း (Quarter round molding) ကို အသုံးပြုပြီး ကွဲပြားသော ကြမ်းပြင်အဆင့်များ သို့မဟုတ် ပစ္စည်းများကြား ချောမွေ့သော ကူးပြောင်းမှုများအတွက် T-ပုံမော်လ်ဒင်းများ ပေးဆောင်ပါသည်။ သင့်အသစ် SPC ကြမ်းပြင်မှ ပိုနိမ့်သော အနီးအနားရှိ မျက်နှာပြင်များသို့ တဖြည်းဖြည်း ကူးပြောင်းရန် လျှော့ချသည့် ပြားများ (Reducer strips) ကို အသုံးပြုပြီး အခန်းများကြား တံခါးဝများတွင် ကူးပြောင်းမှုကို ပြီးစီးစေရန် ကန့်သတ်ချက်ပြားများ (threshold strips) ကို အသုံးပြုပါသည်။
အောက်ခံကြမ်းပြင် ပြင်ဆင်ခြင်းနှင့် အကဲဖြတ်ခြင်း
ရှိပြီးသား အောက်ခံကြမ်းပြင် အခြေအနေများကို အကဲဖြတ်ခြင်း
SPC ဖလို့ခင်းခြင်း တပ်ဆင်မှုအောင်မြင်ရန်နှင့် နောက်ပိုင်းပြဿနာများကို ကာကွယ်ရန် အောက်ခံကုလားကာကို စနစ်တကျ စစ်ဆေးသတ်မှတ်ရန် လိုအပ်ပါသည်။ ကွန်ကရစ်အောက်ခံကုလားကာများအတွက် ပလတ်စတစ်ပြားစမ်းသပ်မှု (သို့) အီလက်ထရောနစ် စိုထိုင်းဆမီတာများကို အသုံးပြု၍ စိုထိုင်းဆပြဿနာများကို စစ်ဆေးရပါမည်။ ကွန်ကရစ်မျက်နှာပြင်များအတွက် လက်ခံနိုင်သော စိုထိုင်းဆအဆင့်မှာ ၅% အောက်တွင် ရှိသင့်ပြီး သစ်သားအောက်ခံကုလားကာများတွင် ၁၂% အောက်ရှိရမည်ဖြစ်ကာ ကျယ်ထွက်မှုပြဿနာများကို ကာကွယ်နိုင်ပါမည်။
SPC ဖလို့ခင်းခြင်းတပ်ဆင်မှုအတွက် ပြားချပ်မှုလိုအပ်ချက်များသည် ရိုးရာဖလို့ပစ္စည်းများထက် ပိုမိုတင်းကျပ်ပါသည်။ လုပ်ငန်းစံချိန်စံညွှန်းများအရ ၁၀ ပေအတွင်း ၃/၁၆ လက်မ (သို့) ၆ ပေအတွင်း ၁/၈ လက်မထက် မပိုရပါ။ ဤစံချိန်စံညွှန်းများကို ကျော်လွန်သောနေရာများကို မြင့်သောနေရာများကို ကြိတ်ခွဲခြင်း (သို့) နိမ့်သောနေရာများကို သင့်လျော်သော ပြားချပ်ညှိပစ္စည်းများဖြင့် ဖြည့်စွက်ခြင်းဖြင့် ပြင်ဆင်ရပါမည်။ အသံမြည်ခြင်း (သို့) လွတ်လွတ်သော အောက်ခံကုလားကာနေရာများကို ဆက်လက်လုပ်ကိုင်မည်မီ ပိုမိုမာကျောအောင် ပိုမိုသော ပိုက်ဆက်များ (သို့) တည်ဆောက်ရေးကပ်ရည်များဖြင့် ခိုင်မာအောင်ပြုလုပ်ရပါမည်။
အဖြစ်များသောပြဿနာများအတွက် ပြင်ဆင်မှုနည်းလမ်းများ
ကွန်ကရစ်အောက်ခင်းများရှိ မြင့်မားသောနေရာများကို သင့်လျော်သော အုတ်မြစ်ပြုပြင်ရန်ကိရိယာများဖြင့် ကြိတ်ခွဲရန်လိုအပ်ပြီး သစ်သားအောက်ခင်းများကိုမူ ပိုမိုတိကျသော ပြားချပ်မှုရရှိစေရန် စက်ဖြင့်ပြုပြင်ခြင်း (သို့) သဲစက်ဖြင့် ကြိတ်ခြင်းများ လိုအပ်နိုင်ပါသည်။ နိမ့်ကျသောနေရာများအတွက်မူ မျက်နှာပြင်ကို ချောမွေ့စေပြီး ပြားချပ်စေရန် ကိုယ်တိုင်ညှိနိုင်သော ပစ္စည်းများကို အသုံးပြုနိုင်ပါသည်။ ထိုပစ္စည်းများသည် အများအားဖြင့် ၂၄ နာရီအတွင်း ခဲပြီး အချိန်ကြာမြင့်စွာ မစောင့်ဘဲ SPC ကို အောက်ခင်းချနိုင်စေပါသည်။
အဆုံးသတ်ကုလားအုပ်ပြားများ တပ်ဆင်မည်မှာဖြစ်သောကြောင့် အောက်ခင်းများ လျော့နေခြင်း (သို့) ပျက်စီးနေသော တံတားကုလားအုပ်များကဲ့သို့သော ဖွဲ့စည်းပုံဆိုင်ရာပြဿနာများကို ကျွမ်းကျင်သူများ၏ အထူးဂရုစိုက်မှု လိုအပ်ပါသည်။ ခလုတ်သံများသည် အောက်ခံကုလားအုပ်များထဲသို့ သင့်လျော်သောအရွယ်အစားရှိသည့် ပိုက်ကြိုးများဖြင့် ပြန်လည်တိုးခိုးပေးရန် လိုအပ်သည့် ပြဿနာကို ဖော်ပြနေခြင်းဖြစ်ပါသည်။ ပျက်စီးနေသော အောက်ခင်းအပိုင်းများကို အသစ်ပြန်လည်တပ်ဆင်ခြင်းဖြင့် SPC ကုလားအုပ်အတွက် ခိုင်မာသော အုတ်မြစ်ကို ဖန်တီးပေးနိုင်ပြီး နောင်တွင် ပြဿနာများကို ကာကွယ်ပေးနိုင်ပါသည်။
တပ်ဆင်မှုလုပ်ငန်းစဉ်နှင့် နည်းလမ်းများ
အစီအစဉ်ရေးဆွဲခြင်းနှင့် ပထမတန်း ကုလားအုပ်တပ်ဆင်ခြင်း
အခန်းနယ်နိမိတ်များတွင် ပို၍ကျဉ်းမြောင်းသော သစ်သားပြားများ ဖြစ်ပေါ်ခြင်းကို ကာကွယ်ရန်နှင့် နေရာတစ်ခုလုံးတွင် ဟန်ချက်ညီမျှသော အမြင်အာရုံကို ဖန်တီးရန် သင့်တော်သော ဒီဇိုင်းအစီအစဉ်ကို ချမှတ်ပါ။ အခန်း၏ အရွယ်အစားများကို ဂရုတစိုက်တိုင်းတာပြီး နောက်ဆုံးတန်း၏ အကျယ်ကို တွက်ချက်ကာ ၂ လက်မထက် ပို၍ကျဉ်းမြောင်းသော ပြားများ မကျန်စေရန် စတင်သည့်နေရာကို လိုအပ်ပါက ညှိယူပါ။ ပစ္စည်း၏ သဘာဝရွေ့လျားမှုကို ခံနိုင်ရည်ရှိစေရန် အခန်း၏ နယ်နိမိတ်များတစ်လျှောက် ၁/၄ လက်မ ခြဲထားရန်ကို ထုတ်လုပ်သူအများစုက အကြံပြုထားပါသည်။
ပထမတန်းသည် တပ်ဆင်မှုတစ်ခုလုံးအတွက် အခြေခံကို တည်ဆောက်ပေးပြီး ပရော်ဖက်ရှင်နယ်အဆင့် ရလဒ်များရရှိစေရန် တိကျစွာ တပ်ဆင်ခြင်းသည် အလွန်အရေးကြီးပါသည်။ ဖြောင့်တန်းသော ကိုးကားမှုမျဉ်းများကို မှတ်သားရန် ချော်ကြော်မျဉ်းများကို အသုံးပြုပြီး ၃-၄-၅ တြိဂံနည်းဖြင့် ထောင့်များကို စစ်ဆေးပါ။ အရှည်ဆုံး၊ ဖြောင့်တန်းဆုံး နံရံမှ စတင်ခြင်းသည် အကောင်းဆုံးရလဒ်များကို ရရှိစေပါသည်။ သို့သော် အခန်း၏ ဖွဲ့စည်းပုံအရ နည်းလမ်းများ ကွဲပြားနိုင်ပါသည်။ နံရံနှင့် ကျပ်လျက်တပ်ဆင်နိုင်စေရန်နှင့် သင့်တော်သော ခြဲထားမှုကို ထိန်းသိမ်းရန် ပထမတန်းရှိ ပလပ်ကျော်များမှ လျှာအစိတ်အပိုင်းများကို ဖယ်ရှားပါ။
တဖြည်းဖြည်းတိုးတက်သော တန်းတပ်ဆင်မှုနှင့် ပုံစံစီမံခန့်ခွဲမှု
တပ်ဆင်မှုတစ်လျှောက် ဖွဲ့စည်းတည်ဆောက်မှု မပျက်ပြားစေဘဲ ပြားတိုင်းကို အဆင့်ဆင့် တပ်ဆင်ခြင်းက အမြင်အာရုံကို ဆွဲဆောင်မှုရှိစေပါသည်။ အနီးစပ်ဆုံး တန်းများကြား အဆုံးအစွန်းများတွင် အနည်းဆုံး ၆ လက်မ ကွာခြားမှုကို ထားရှိပါ၊ ၈ မှ ၁၂ လက်မ အဆင့်ဆင့်တပ်ဆင်ခြင်းက အကောင်းဆုံး ပုံပန်းသွင်ပြင်ကို ဖန်တီးပေးပါသည်။ ကွဲပြားသော အဆက်အစပ်များက သဘာဝကျသော်လည်း အဆက်အစပ်များကို ထင်ရှားစေသည့် ထပ်တလဲလဲ ပုံစံများကို ရှောင်ပါ။
အရည်အသွေးမြင့် SPC ကြမ်းပြင်များတွင် အသုံးပြုသော click-lock ချိတ်ဆက်မှုစနစ်သည် သင့်တော်သော တပ်ဆင်မှုအတွက် သတ်မှတ်ထားသော နည်းလမ်းများ လိုအပ်ပါသည်။ ရှည်လျားသော အစွန်းများကို ချိတ်ဆက်ရာတွင် ပြားများကို ၂၀-၂၅ ဒီဂရီခန့် ထောင့်ဖြင့် ချိတ်ဆက်ပြီးနောက် ချိတ်ဆက်မှု ခိုင်မာစွာ ကလစ်သံကြား ကျုံ့သွားသည်အထိ ဖြည်းဖြည်းချင်း ကျစေပါ။ အဆုံးအစွန်းများကို ချိတ်ဆက်ရာတွင် အများအားဖြင့် ရွှေ့ပြောင်းခြင်း လှုပ်ရှားမှုများ သို့မဟုတ် ချိတ်ဆက်မှုစနစ်အလိုက် အထူးကိရိယာများကို လိုအပ်တတ်ပါသည်။ ဖိအားကို တသမတ်တည်း ထားရှိခြင်းဖြင့် အကွက်များ သို့မဟုတ် မြင့်နေသော အစွန်းများ မဖြစ်စေဘဲ ချိတ်ဆက်မှု ပြီးပြည့်စုံစေပါသည်။
အဆုံးသတ်အသွင်အပြင်နှင့် ပရော်ဖက်ရှင်နယ် အသွင်အပြင်များ
ကူးပြောင်းမှုနှင့် မော်လ်ဒင်း တပ်ဆင်ခြင်း
ပရော်ဖက်ရှင်နယ်ကျသော အသွင်အပြင်ရှိသည့် တပ်ဆင်မှုများအတွက် အခန်းအစွန်းများတစ်လျှောက်ရှိ ပြောင်းလဲမှုအသေးစိတ်နှင့် အလှဆင်အလုပ်များကို ဂရုတစိုက် အာရုံစိုက်ရန် လိုအပ်ပါသည်။ စတုတ္ထစက်ဝိုင်း မော်လ်ဒင်းသည် SPC ကြမ်းပြင်၏ ပုံပန်းသဏ္ဍာန်ကို ဖြည့်စွက်ပေးရင်း ချဲ့ထွင်မှုကွာဟမှုများကို ဖုံးအုပ်ပေးပါသည်။ သို့ရာတွင် ကြာရှည်ခံသော ရလဒ်များအတွက် မှန်ကန်သော တပ်ဆင်နည်းလမ်းများကို အသုံးပြုရပါမည်။ သစ်သားမော်လ်ဒင်းများတွင် ကွဲအက်ခြင်းကို ကာကွယ်ရန် အစောပိုင်းတွင် အပေါက်ဖောက်ပေးပါ။ ကြမ်းပြင်ပေါ်တွင် မဟုတ်ဘဲ နံရံများတွင် မော်လ်ဒင်းကို တိကျစွာ တံဆိပ်ခတ်နိုင်သည့် သင့်တော်သော ချိတ်ဆက်မှုပစ္စည်းများကို အသုံးပြုပါ။
တံခါးဝများတွင် ပြောင်းလဲမှုများကို မတူညီသော ကြမ်းပြင်ပစ္စည်းများကြား ချောမွေ့သော ချိတ်ဆက်မှုများ ရရှိစေရန် တိကျသော တိုင်းတာမှုနှင့် ဖြတ်တောက်မှုနည်းလမ်းများ လိုအပ်ပါသည်။ T-မော်လ်ဒင်းပြားများသည် အတူတူအမြင့်ရှိသော ကြမ်းပြင်များကို အကောင်းဆုံးဖြည့်ဆည်းပေးပြီး ပြားချပ်ပြားများသည် SPC ကြမ်းပြင်နှင့် အနီးအနားရှိ မျက်နှာပြင်များကြား အမြင့်ခြားနားမှုများကို ကိုင်တွယ်ဖြေရှင်းပေးပါသည်။ ပြောင်းလဲမှုပြားများ တပ်ဆင်ခြင်းအတွက် တိကျသော ဖြတ်တောက်မှုများနှင့် ချိတ်ဆက်ထားသော ကြမ်းပြင်စနစ်များ၏ လွတ်လပ်သော လှုပ်ရှားမှုကို ခွင့်ပြုသည့် မှန်ကန်သော တံဆိပ်ခတ်မှုနည်းလမ်းများ လိုအပ်ပါသည်။
နောက်ဆုံးသုတ်သင်ရေးနှင့် အရည်အသွေးစစ်ဆေးမှု
စနစ်တကျသန့်ရှင်းရေးပြုလုပ်ခြင်းဖြင့် တပ်ဆင်မှုကြောင့်ဖြစ်ပေါ်လာသော အမှိုက်အစွန်းများကို ဖယ်ရှား၍ သင့်အသစ် spc ကြမ်းပြင်ကို ပုံမှန်အသုံးပြုမှုနှင့် ထိန်းသိမ်းမှုအတွက် အဆင်သင့်ဖြစ်အောင်ပြင်ဆင်ပေးပါသည်။ ကြမ်းပြင်ပေါ်ရှိ ဖုန်များနှင့် အမှုန်အမှိုက်များကို စက်တပ်ဖြင့် စုပ်ယူပါ၊ အထူးသဖြင့် အမှိုက်များစုပုံတတ်သော ထောင့်များနှင့် အစွန်းများကို အထူးဂရုပြုပါ။ ထုတ်လုပ်သူမှ အကြံပြုထားသော သန့်ရှင်းရေးဆေးဖြင့် စိုစွတ်သော မော်ပြားဖြင့် သန့်စင်ခြင်းဖြင့် ကျန်ရှိနေသော အညစ်အကြေးများကို ဖယ်ရှားပြီး ကြမ်းပြင်၏ အဆုံးသတ်ပုံစံကို ပိုမိုထင်ရှားစေပါသည်။
အရည်အသွေးစစ်ဆေးခြင်းတွင် ကြာရှည်စွာအသုံးပြုမှုကို ထိခိုက်စေနိုင်သော ပြားများပြားခြင်း၊ အဆက်အစပ်များတွင် ကွာဟမှုများရှိခြင်း သို့မဟုတ် အခြားတပ်ဆင်မှုပြဿနာများကို စစ်ဆေးပါသည်။ အသံထွက်မှုများကို နားထောင်ရန် ကြမ်းပြင်တစ်ခုလုံးကို လမ်းလျှောက်ပါ၊ ဤသို့သောအသံများသည် အဆက်များ မပြည့်စုံခြင်း သို့မဟုတ် အောက်ခံကြမ်းပြင်ပြဿနာများကို ညွှန်ပြနိုင်ပါသည်။ အခန်း၏ အစွန်းပတ်လည်တွင် သင့်တော်သော ချဲ့ထွင်မှုကွာဟချက်များရှိမရှိ စစ်ဆေးပြီး ဘေးတွင်ရှိသော မျက်နှာပြင်များနှင့် အဆင်းများသည် လုံးဝတပ်ဆင်နေကြောင်း သေချာစေပါ။ ထိုသို့ပြုလုပ်ခြင်းဖြင့် ဘေးကင်းပြီး အလှဆင်ထားသော ရလဒ်များကို ရရှိမည်ဖြစ်သည်။
မေးလေ့ရှိသောမေးခွန်းများ
ပုံမှန်အခန်းတစ်ခန်းတွင် spc ကြမ်းပြင်တပ်ဆင်ရန် မည်မျှကြာမည်နည်း
SPC ကြမ်းပြင်ကို တပ်ဆင်ရန် အချိန်သည် အခန်းအရွယ်အစား၊ ရှုပ်ထွေးမှုနှင့် တပ်ဆင်သူ၏ အတွေ့အကြုံပေါ်တွင် မူတည်ပြီး ပြောင်းလဲနိုင်ပါသည်။ သို့သော် ပုံမှန်အားဖြင့် အိပ်ခန်းအရွယ်အစား (၁၂x၁၂ ပေ) ကို DIY တပ်ဆင်သူများက ၄ မှ ၆ နာရီအတွင်း ပြီးစီးနိုင်ပါသည်။ ဧည့်ခန်းကဲ့သို့သော ပိုကြီးသည့်နေရာများတွင် ၈ မှ ၁၂ နာရီခန့် လိုအပ်နိုင်ပြီး အတားအဆီးများစွာပါသည့် ရှုပ်ထွေးသော ဒီဇိုင်းများတွင် တပ်ဆင်ရန် အချိန်ပိုကြာနိုင်ပါသည်။ ကျွမ်းကျင်သော တပ်ဆင်သူများသည် အတွေ့အကြုံနှင့် အထူးကိရိယာများကြောင့် အလားတူပရောဂျက်များကို အချိန်၏ တစ်ဝက်ခန့်အတွင်း ပြီးစီးနိုင်ပါသည်။
SPC ကြမ်းပြင်ကို ရှိပြီးသား ကျောက်ခဲကြမ်းပြင် သို့မဟုတ် သစ်သားကြမ်းပြင်ပေါ်တွင် တပ်ဆင်နိုင်ပါသလား
SPC ကြမ်းပြင်ကို ပြားချပ်မှုနှင့် တည်ငြိမ်မှု လိုအပ်ချက်များကို ဖြည့်ဆည်းပေးပါက အများအားဖြင့် ရှိပြီးသား ကြမ်းပြင်မျက်နှာပြင်များပေါ်တွင် တပ်ဆင်နိုင်ပါသည်။ ကျောက်ခဲကြမ်းပြင်များကို ခိုင်မာစွာ တပ်ဆင်ထားပြီး မျက်နှာပြင်၏ ကွဲပြားမှုများသည် ထုတ်လုပ်သူ၏ အသေးစိတ်အချက်အလက်များကို မကျော်လွန်ပါက ကောင်းမွန်စွာ အလုပ်လုပ်ပါသည်။ သစ်သားကြမ်းပြင်များအတွက် လွတ်လွတ်ထွက်ထွက် သစ်ပျော်များ သို့မဟုတ် အလွန်အကျွံ ပျက်စီးမှုများ ရှိမရှိ သေချာစွာ စစ်ဆေးရန် လိုအပ်ပြီး SPC ကြမ်းပြင်တပ်ဆင်ရန် သင့်တော်သော ပြားချပ်မှုကို ရရှိရန် ပိုမိုပြင်ဆင်ရန် လိုအပ်နိုင်ပါသည်။
SPC ကိုပ်ခင်းကို တပ်ဆင်နေစဉ်အတွင်း ရေစိုထိုးဝင်ပါက ဘာဖြစ်မည်နည်း
SPC ကိုပ်ခင်းသည် ရေပျက်စီးမှုကို ခုခံနိုင်သော်လည်း တပ်ဆင်နေစဉ်အတွင်း ရေစိုများ ပိတ်မိပါက အောက်ခံကုလားကာပစ္စည်းများနှင့် ပိုးမွှားများ ကြီးထွားလာနိုင်သော သဘာဝပစ္စည်းများတွင် ပြဿနာများ ဖြစ်ပေါ်စေနိုင်ပါသည်။ အန္တရာယ်များသောနေရာများတွင် ရေစိုကာအလွှာများ ထည့်သွင်းခြင်းအပါအဝင် အောက်ခံကုလားကာကို သင့်တော်စွာပြင်ဆင်ခြင်းဖြင့် ရေစိုနှင့်ဆိုင်သော ပြဿနာအများစုကို ကာကွယ်နိုင်ပါသည်။ တပ်ဆင်ပြီးနောက် ရေစိုဝင်ပါက ရေစိုမှုအရင်းအမြစ်များကို ဖြေရှင်းပြီး ထိခိုက်သောနေရာများကို လုံးဝခြောက်သွေ့သည်အထိ စောင့်ပြီးနောက် စုပ်ယူနိုင်သောကုလားကာစနစ်သည် လွယ်ကူစွာ ဖယ်ရှား၍ ပြန်လည်တပ်ဆင်နိုင်ပါသည်။
SPC ကိုပ်ခင်းအတွက် ပရော်ဖက်ရှင်နယ်တပ်ဆင်မှုသည် အပိုကုန်ကျစရိတ်အတွက် တန်ဖိုးရှိပါသလား
ပရော်ဖက်ရှင်နယ်တပ်ဆင်မှုသည် ဈေးကြီးသောအမှားများကို ကာကွယ်ပေးနိုင်သည့် အာမခံ၊ အထူးကိရိယာများနှင့် အတွေ့အကြုံများကို ပေးစွမ်းပေးသော်လည်း အိမ်ရှင်အများအပြားသည် စနစ်ကျသော ပြင်ဆင်မှုနှင့် သည်းခံမှုဖြင့် SPC ကြမ်းပြင်ကို ကိုယ်တိုင်တပ်ဆင်ခြင်းကို အောင်မြင်စွာ ပြီးမြောက်စေကြသည်။ ရှုပ်ထွေးသော ဒီဇိုင်းများ၊ အချိန်ကန့်သတ်ချက်များ သို့မဟုတ် သင့်စီမံကိန်းတွင် ကြမ်းပြင်အောက်ခံပြင်ဆင်မှု အကျယ်တဝင့် လိုအပ်ပါက ပရော်ဖက်ရှင်နယ်တပ်ဆင်မှုကို စဉ်းစားပါ။ DIY တပ်ဆင်မှုသည် ကုန်ကျစရိတ်ကို သိသိသာသာ ချွေတာပေးပြီး ကိုယ်တိုင်လုပ်ဆောင်ရသည့် ကျေနပ်မှုကို ပေးစွမ်းသောကြောင့် ပုံမှန်အခန်းအထွေထွေ ဖွဲ့စည်းပုံများရှိ ရိုးရှင်းသော စီမံကိန်းများအတွက် ဆွဲဆောင်မှုရှိသော ရွေးချယ်စရာတစ်ခုဖြစ်သည်။
အကြောင်းအရာများ
- နားလည်မှု SPC ကြမ်းပြင် တည်ဆောက်မှုနှင့် အကျိုးကျေးဇူးများ
- လုပ်ဆောင်ချက်အတွက် အခြေခံလုပ်ငန်းများနှင့် ပစ္စည်းများ
- အောက်ခံကြမ်းပြင် ပြင်ဆင်ခြင်းနှင့် အကဲဖြတ်ခြင်း
- တပ်ဆင်မှုလုပ်ငန်းစဉ်နှင့် နည်းလမ်းများ
- အဆုံးသတ်အသွင်အပြင်နှင့် ပရော်ဖက်ရှင်နယ် အသွင်အပြင်များ
-
မေးလေ့ရှိသောမေးခွန်းများ
- ပုံမှန်အခန်းတစ်ခန်းတွင် spc ကြမ်းပြင်တပ်ဆင်ရန် မည်မျှကြာမည်နည်း
- SPC ကြမ်းပြင်ကို ရှိပြီးသား ကျောက်ခဲကြမ်းပြင် သို့မဟုတ် သစ်သားကြမ်းပြင်ပေါ်တွင် တပ်ဆင်နိုင်ပါသလား
- SPC ကိုပ်ခင်းကို တပ်ဆင်နေစဉ်အတွင်း ရေစိုထိုးဝင်ပါက ဘာဖြစ်မည်နည်း
- SPC ကိုပ်ခင်းအတွက် ပရော်ဖက်ရှင်နယ်တပ်ဆင်မှုသည် အပိုကုန်ကျစရိတ်အတွက် တန်ဖိုးရှိပါသလား